Orange & pomegranate peel Powder

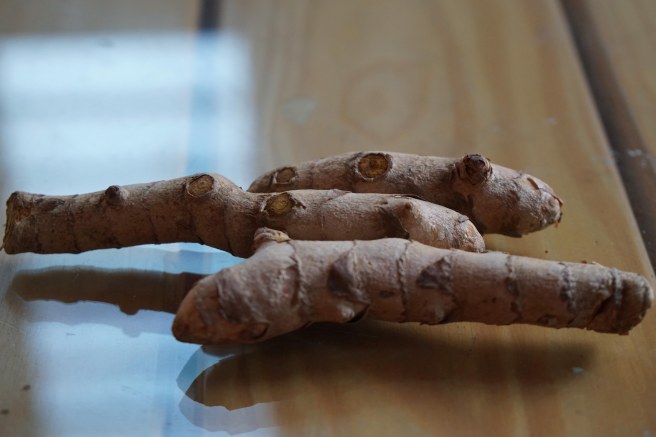
While grocery shopping, I saw packets of orange peel face pack and scrub on the shelves. I have been working with fruit peels for some time now, but not been able to figure out a proper usage for it. While most of the green waste in my home goes into the compost, I always had to throw away citric ones. I did try a few different things, yet, a lot is wasted. So, I decided to give this a try.

DSC08886

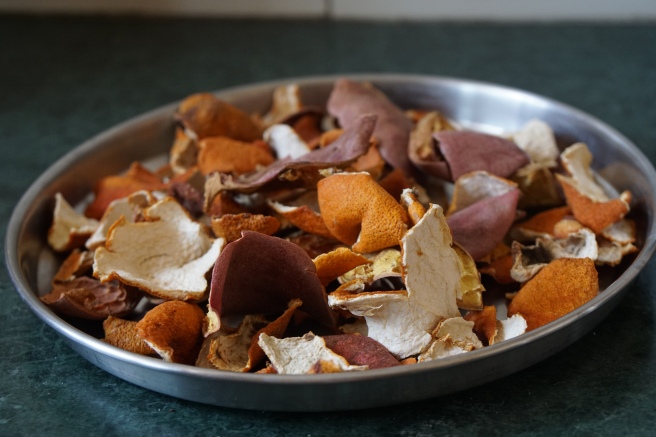
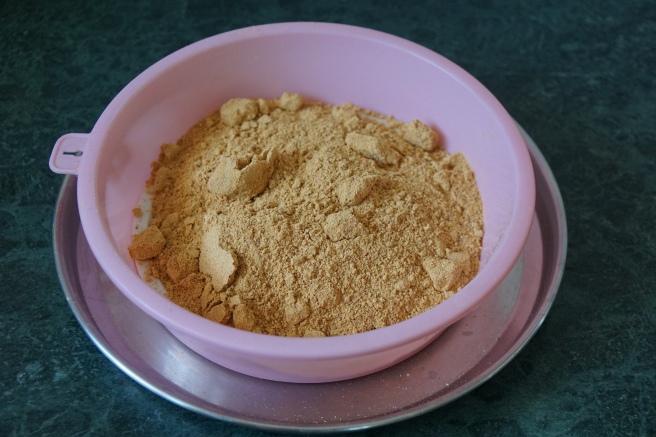
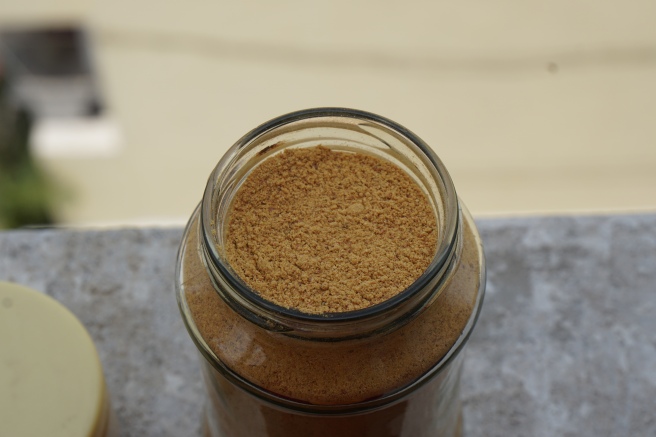
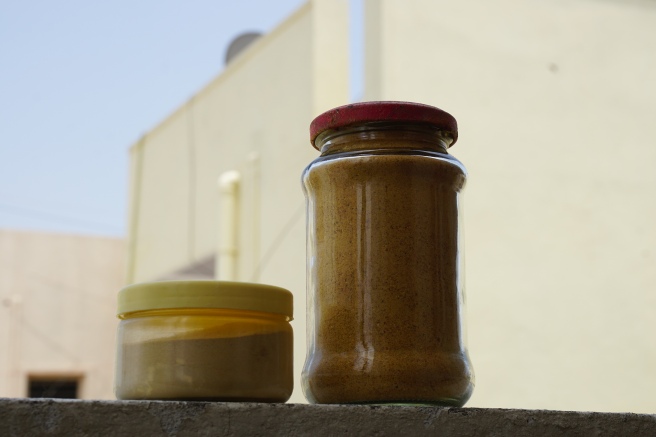
I have read a lot about the amazing benefits of pomegranate peels and since we were full of both the fruits, so, why not powder them both I thought. Now reminding myself to not throw away the peels was another part of the story, now I was following DH every time he picked up an orange or pomegranate. Many were saved from verge of being dumped. It took extra effort from DH ofcourse. Once that was done, I cut the peels into small pieces, covered it with muslin cloth and dried them under the sun, after 3-4 days of direct sun light, shifted it to another place where it got indirect sun light for another week. I ensured there’s no moisture left, I powdered it in a mixture.

DSC08890

Let me share a few benefits of orange and pomegranate peel powder that lured me into this project:

Benefits:

1. Anti aging properties
2. Treat pimples and acne scars
3. Add natural glow to your face
4. Rich source of vitamin C
5. An effective natural scrub
6. Orange peel act as a natural bleach
7. Improves dental health

I use it as a face & body scrub and also add it to my face pack. As we know citrus do dry out the skin, I prefer using it with a moisturizing agent like honey or curd.
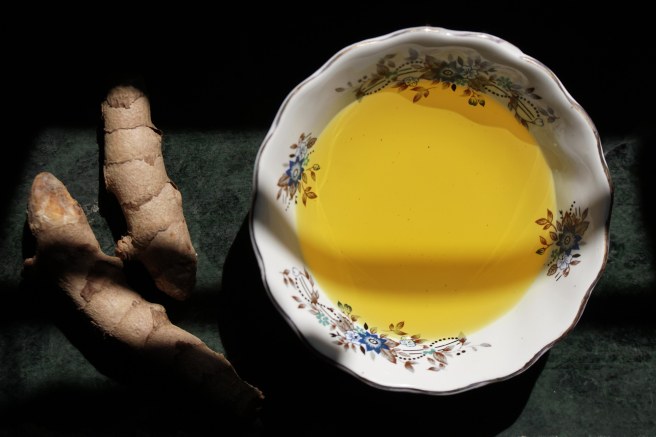
Simple Face Pack: 

Home made peel powder: 1 tbsp
Curd: 1 tbsp
Turmeric: 1/2 tsp
Mix it well and apply it on your face for 15-30 min. Once it is dry, slowly scrub it in circular motion and wash your face with normal water.

DSC08896

The first thing to notice about the pack is the smell…it smells wonderful! Secondly, it leaves the skin very smooth and soft, no stretchy feeling and no tightness. Though I notice acne scar feeding but it might take a few months to completely fade away the scars. I feel its a safer way for the long run, unlike those chemicals based products that goes into our skin and then into our blood stream causing damages. But the best part is, its so easy to make!

DSC08895

Recently DH munched on a big piece of watermelon and handed me the skin, I looked at him and asked, “Why are you giving this to me?” he replied, “How would I know…..you tell me, what would you do with this one!?”


Skin care and turmeric oil

This post got deleted in the final stage of editing…..

5

I am a homemaker, a teacher, an inquisitive  person, an experimenter and of course being a womdan, natural skin & hair expert!!

DSC08495
I used turmeric roots, homemade turmeric powder can also be used

I love turmeric and I can vouch on it, I have been using it since I was a child. During festivals or auspicious occasions my mother would make a paste of turmeric roots and apply on my whole body. The yellow tan did not matter much then, because many other neighborhood kids also roamed around looking like yellow zombies. It carried on to my teens and has continued till date, except that it has reduced from a bowl to a pinch, and from whole body to only face!

DSC08500
Grated the turmeric roots and cooked in coconut oil over low flame till all the moistures vapourises

Here I am sharing the very easy turmeric oil making process along with my recent experience, hoping it might be helpful. Around 2014 DH started getting small red patches over his forehead and cheeks, it was extremely dry and itchy, slightly swollen, it aggravated when exposed to sun. Every day he would return home with new the red patches which eventually turn into white dry patches. Soon my once carefree hubby was  under constant fear of getting out in the sun. And things looked  worse day by day. It looked dry so I guessed a good moisturizer would do the job but soon realized it was not so. Next we went for the sunscreen but that too did not do much good. Then an appointment with a skin specialist, who consoled us saying nothing serious and prescribed medicine.  Soon winter approached and with the medicine his skin healed.

DSC08504
Allow it to cool down

Up until the next summer, during which it all came back and this time doubled the size. We were at our home town, there we consulted another doctor and again medicines were brought. On returning back, I did my own little research  and found alovera gel to be magic cure, well no harm in trying I said, and DH was convinced. Patanjali Alovera gel was the brand I choose and even before any effect was visible DH kind of enjoyed the massage he was getting every night (which was in itself a proof of something good is happening). A few months into the regime, I added the second most referred ingredient to alovera gel and it was also my favorite! A few drops of turmeric oil (home made). Even after his medicines were over, we continued with our alternative therapy. It was nearly after four months, when we first saw its effectiveness. Soon, we were on our own, trekking, Goa tour, Pondicherry trip, Coorg trip and many more without any issue. Once a 30 minut to-and-fro ride from home to office left scars and itchy skin, we were more than glad with the results! First the itchiness was gone, then the reddenning due to sun and finally the white dry patches now slowly fading. With all that, we still continue the regime as its important to understand that any issue be it acne or eczema or anything, they are the reflection of some deeper issue, which might be pollution or immune system or age or anything else. We accepted that his skin has become sensitive and we will continue with this simple trick. We cannot say how long it will take to completely cure and we are not waiting for it. It’s just like applying any other moisturizer or sunscreen! We’re happy to know that if we can get rid of something in a natural and healthier way then why not!

DSC09615
Strain it and bottle it!

I have shared the turmeric oil making process, it’s simple and easy & I use it occasionally as skin moisturizer too. Other oils that I love and keep alternating with turmeric oil are coconut oil, almond oil, kumkumadi tailam. Other oils that sit beside my bed are castor oil for cracked heels, neem oil for acne, mustard oil for hair and feet massage ……and many more, will share about them in future.

DSC09608


A new project : Storage Ottoman

A new project in the making.

I was so happy to see this small wooden transport-box, when DH picked it from his office waste and brought home, unpolished and a little messy, all of that added a little story to it.
We went through some brain storming, I wanted to use it for gardening,to grow herbs but dh had something else in mind.Since his idea was more practical, I agreed. Before we get started, let me tell you, everything that are used in the making of this ottoman are waste or rejected materials (except the screws and plastic boots bought from the nearby hardware store), everything recycled.  So, lets get started….

1
Raw materials used in the making.

As you can see, it’s unpolished and we liked the rusty look to it. We did not want to polish it or color it, rather it looks more artistic and has its own character.
In the second part, hard packing foams are used as base material over the lid, cut in shape and glued (had to do a little workaround to get the right shape).

2

3

4
😎  Ensuring the foam is glued to its best!

At first we planned to use only the hard foam for the sitting, but then thought of adding a softer material on the top, as only hard foam was not comfortable enough for sitting…we were lucky to find a good piece of soft packaging sponge in our junk collection.

5
Soft sponge cut into shape and glued over the hard foam.
6
Wrapping the whole thing with sack.
7
Screws to keep things intact.
8
Plastic Boots are used  so the lid stays fit to the top of the box.
9
Whoopee!!
10
Our model! Neighbor kid “Chinna”who comes now and then for his school projects

I wish to share a small memory of mine here,  once I saw an old man, a rickshaw puller, his wrinkly hands very carefully and neatly pushing small pieces of cloth inside his rickshaw seat, arranging them evenly. He must have collected those scrap pieces of clothes from tailor shops, which they usually throw away. Tiny pieces of clothes… impossible to do anything with them, I’ve tried. But he could make use of them. I was moved seeing him, pieces of cloth would be hanging out here and there, and he very carefully arrange them. There was something in his eyes, he didn’t appear poor or sad to me at that point, rather he looked so much at peace, he was so much in the moment…. a child like amusement on his face.

What are these ‘things’? What is their place in our lives….?? Things we consider useful or useless says something about us, about who we are, the person we are deep down.We can never know what can make whom happy, we can never know. Something might be a waste for me and can be a ‘thing of happiness’ for some one else, and it might be a need to someone else. Like this last picture… look what a child could see in the left over cut out pieces and what he made with it!!

11
Here’s what Chinna made with the left over scraps… 🙂

Bhringraj Oil

I’ve always loved oiling my hair. The gentle massage, the warmth of the oil…ahh, only one who has experienced knows. Ever since I switched from chemical shampoos to natural ones I also incorporated some ayurvedic hair oils. I found curry leaves oil, amla oil and bhringraj oil to be very useful. Instead of buying an oil with all these ingredients I decide to make them myself and try one at a time.

Today I’ll be share how to make Bhringraj oil and its super easy! While writing this post I did a little research and found that bhringraj is a wonderful herb and has many many benefits. Bhringaraj is considered as the main herb for the hair care. It is a wonderful liver tonic, provides relief from cold & cough, used as dye just to name a few.

DSC05839-edt
Bhringraj Powder and coconut oil

It is always better to use fresh ones but I could only manage to find powder. And coconut oil I used Patanjali as I find it comparatively more reliable than the rest.

DSC05848-edt
2 tbl spoon of Bhringraj powder mix in litter water to get a fine paste.

Once the paste of Bhringraj powder mixed in water is ready put a open mouth pan on the gas stove and add about 1 1/2 cup of coconut oil to it. When the oil is warm (not boiling) add the paste to the oil.

DSC05851-edt
Coconut Oil in a wide mouth utensil

After adding the paste to the warm oil bubbles will start forming, be at a safer distance. Wait for the bubbles to come down as the water portion in the paste vaporizes.

DSC05853-edt
As the Bhringraj powder slowly cook on low flame,it releases its medicinal values into the oil.

When all the bubbles disappears, know that there is no more water left ( follow your instincts, experience is the only best teacher) turn off the flame and let it cool down.

DSC05866-edt
Stained and ready to use! It looks black to deep green but in hand its just greenish

Strain the oil through a strainer and store it in a bottle. The color of the oil as you can see, is dark green. The oil is thicker than plain coconut oil. It has its own aroma, though I liked it, some might not find it very pleasant. I apply it overnight and wash it off the next day. It can also be applied 30 minutes prior to shower also. But like grannies say, the longer the better!

Last words, do not expect wonders. Do not think that hair fall or graying will stop overnight. I enjoy the process, the process of exploring, knowing different herbs and their importance, preparing it and at the end when I use it I derive much more satisfaction than I would have from a store brought one. My hairs definitely feel stronger and hair fall reduced but most importantly I feel better.

DIY Apron from Old Jeans

What do you do with your old stuffs?? Do you donate them or recycle them or give away…what’s your way of management?

Here, in our home we do all of it and then there are ones’s that get hijacked even before we know 😉 (siblings!). Being a craft person I tuck away some for different  project, like this one!  Let me take you through a pictorial tour!

DIY : Old Jeans Apron
As I started off, I had a pair of jeans to work with and some scrap clothes and i needed an apron,  one idea led to the other and things started merging up.

2p
Cut one leg off the Jeans
3p
Cut one side open
100_4654
Mark the arms on both sides
100_4659
This is how it looks after cutting!
7p
Used another shade of denim for border & pockets.
8p
Hand stitched all the borders.
9p
Sewing the pockets
10p
Final trimmings & stitches to be done but almost there!
DSC05341-1
Final look! So proud 😉